Hybrid - Solar and Wind Turbine Energy DIY System - Pre-Engineered Kits - Get the Best Energy System
Do your Solar DIY Kit Shopping Today
Sol-Ark Hybrid Kits with Solar and Wind in one system
1.7 kW
.jpeg)
2.5 kW
3.5 kW
.jpeg)
4.2 kW
.jpeg)
5 kW
.jpeg)
5.9 kW
Sol-Ark Hybrid Kits with Solar and Wind in one system

6.7 kW
.jpeg)
7.5 kW

8.5 kW
.jpeg)
9.2 kW
.jpeg)
10 kW
.jpeg)
17.5 kW
Wind and solar panels together
Parts of a Wind Solar Hybrid system
Off-grid kits
Click the Tab Above ⇑ Planning Design & Installation Tips along with the Video Tab to Learn More.
“Do I have a good home for solar energy and wind power system?”
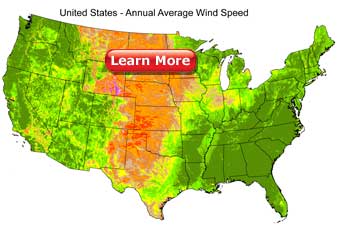
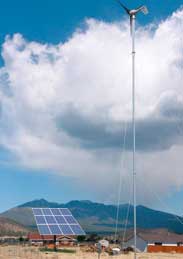 Consult Wind Resource Maps: Click on the planning, design and installation tips tab above where you will find a resource map link for wind and solar. Use these maps to determine how much wind and solar in your area is available. Get the best off grid power systems.
- Airport Wind Speed Data: Though not definitive, your nearby airport can provide good information about the average local wind speed for your area. You need to be a little cautious because the information recorded at the local airport may be on land that is flatter and less obstructed than your lot and is usually measured at heights of 20 - 30 feet off the ground.
- Use a Wind Speed Measuring System: Though not as accurate as more expensive system, you can purchase equipment to monitor your sites wind speed allowing you to record to your satisfaction your available wind resource. The measurement equipment must be set high enough to avoid buffering created by buildings and trees. The best location would be at the top of the proposed tower height you intent to place your turbine.
- Zoning, Permitting and Local Restrictions: Before you invest in a hybrid wind power system, you should check with your local code officials and association (If Applicable) to find out if there are any restrictions. In addition to zoning issues, your neighbors might object to a wind turbine that interferes with their view.
- Height Restrictions: Some towns or HOA have restrictions on the height of structures in their zoned areas. Althought you can sometimes get a variance, many zoning laws limit the height to 35 feet.
- Noise Issues: Small wind turbine noise is only slightly above wind noise. (Click On Video Tab Above) You may be able to pick out the sound of a hybrid wind turbine if you strain to listen but most people would not find it objectionable. However, if there is any doubt if your wind turbine will disturb your neighbor, be a good neighbor and have a conversation with the family living next door in advance.
- Shadow Flicker: Shadow flicker occurs when the blades of the wind turbine rotor cast a shadow across nearby windows. This shadow can have a disturbing effect sometimes referred to as the strobe light effect. Small turbines are less of a problem but you should give it some thought.
- Birds: There is no way to dance around this discussion. Wind energy does kill some birds some of the time, but no more than tall structures and most sources of energy.
Hybrid Primus Wind Solar Magnum Energy Off-grid Battery Based Power Systems
Pre Engineered and Designed DIY Solar Packages Kits
TIP: The power output of a wind turbine decreases roughly 3% for every 1,000'of elevation above sea level due to lower air pressure.
Measuring Wind Speed
If you do not have a wind gauge, you can get a rough idea of wind speed using the guidlines below.
- 0-1 MPH - Smoke rises vertically
- 2-3 MPH - Direction of wind shown by smoke drift but not by wind vanes.
- 4-7 MPH - Wind felt on face; leaves rustle; ordinary wind vane moves
- 8-12 MPH - Leaves and twigs in constant motion; wind extends a light flag
- 13-18 MPH - Raises dust, loose paper; small branches are moved
- 19-24 MPH - Trees in leaf begin to sway; crested wavelets form on water
- 25-31 MPH - Large branches in motion; whistling heard in power lines/
Ok, You Are Satisfied You Have Enough Wind in Your Area, Now What?
Now, it is time to consider site specific issues associated with installing the hybrid solar wind system. The most important factor in maximizing the performance of your wind generator is the correct siting on your property. The better the siting, the greater the performance. Small increases in average site specific wind speeds result in dramatic increases in energy output of your wind generator. For example, an increase in wind speed of 10% (10 mph - 11 mph; 4.5 m/s - 5 m/s) results in approximately a 30% increase in the power available from the wind. Therefore, the better the location the better the performance. As a rule, the small wind generator should be mounted as high and as far away from obstructions as possible.
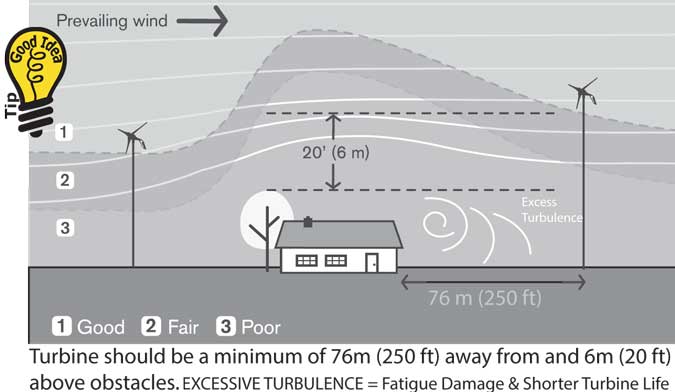
● Two basic necessities for a good hybrid site pick are average wind speed and low ground turbulence. The lower the turbulence or buffering, the less stress you will put on your wind generator and the more energy it will produce.
● A good rule of thumb if your tower is downwind from a building it should be 20' - 30' above the height of the building as well as any barrier such as a stand of trees that are closer than a 500' radius.
● Surface Roughness: Rough ground is land covered with small bushes, trees or other obstructions. Smooth land is an area covered only by grass or dirt. The smoother the ground, the less the friction. The rougher the ground the greater the friction, thereby requiring the tower to be higher.
● Place your tower on the highest land point around your home as practical. There are circumstances where the highest point available may not be the best place for your tower. Highest land nearby may be awkward to get to, may be too far away from where you need the power, or may expose your wind turbine to potentially damaging turbulent conditions.
● How high is your tower? Hands down, the biggest mistake a homeowner can make with a small wind turbine is putting the turbine on too short of a tower. Like solar in the full sun with no shade, any renewable energy source must have good access to the fuel that drives the electricity. There is nearly 100% more power available in 10 MPH winds than 8 MPH winds.
Attaching anything related to a wind turbine to your house is a bad idea.
![]() Never attach the tower to your house.
If the tower were attached anywhere to a structure, the structure itself would begin to vibrate ever so slightly. This reverberation would vibrate the building with the possiblity over time of structural damage.
Never attach the tower to your house.
If the tower were attached anywhere to a structure, the structure itself would begin to vibrate ever so slightly. This reverberation would vibrate the building with the possiblity over time of structural damage.
Primus Wind, SolarEdge, Sol-Ark, StorEdge , Ephase, Solar Battery Backup.
Grid-Tie, Off-grid, DIY Solar Backup Power - Wind Self-Consumption Installation Packages and Kits
Harnessing the Power of Nature: Wind, Solar, and DIY Kits for Energy Independence
In today's world, facing climate change and rising energy costs, renewable sources like wind and solar shine brighter than ever. These abundant, clean resources offer a path to energy independence, reduced reliance on fossil fuels, and a more sustainable future. But how can we, as individuals, tap into this potential? Enter the exciting world of DIY renewable energy kits, with Blue Pacific Solar leading the charge.
Wind and Solar: A Powerful Duo
Wind and solar energy work beautifully together. Wind turbines harness the power of moving air, converting it into electricity. Solar panels, on the other hand, capture the sun's radiant energy and transform it into electricity through the photovoltaic effect. This complementary nature ensures a more reliable and consistent energy supply, even when one resource is less available.
Blue Pacific Solar: DIY Kits for the Empowered Homeowner
Blue Pacific Solar stands out with its user-friendly and comprehensive DIY kits. Whether you're experienced or a beginner, their kits cater to various skill levels and energy needs.
Benefits of DIY Renewable Energy Kits:
- Cost-effective: Save compared to professional installations, especially in the long run.
- Empowering: Take control of your energy generation, fostering self-reliance and a deeper connection to your home's energy flow.
- Educational: Building your own system provides valuable hands-on learning.
- Environmentally friendly: Reduce your reliance on fossil fuels and contribute to a cleaner planet.
Getting Started with Blue Pacific Solar
Visit Blue Pacific Solar's website for detailed kit descriptions, assembly guides, troubleshooting tips, and a supportive online community. They also offer excellent customer service to guide you every step of the way.
Beyond the Kit: Building a Sustainable Future
Investing in a DIY renewable energy kit is more than just generating power; it's a statement of your commitment to a cleaner and more sustainable future. Every kilowatt-hour of renewable energy produced contributes to reducing our dependence on fossil fuels and mitigating climate change.
As technology evolves and costs decrease, DIY renewable energy solutions will become increasingly accessible. Blue Pacific Solar is at the forefront of this movement, empowering individuals to take charge of their energy needs and contribute to a brighter, more sustainable tomorrow. So, why not harness the power of nature and embark on your own renewable energy journey with Blue Pacific Solar.
- Efficient DIY Solar Panels Kit
- Type of Solar Panels for Sale
- Net Metering Panel Kit
- Federal Solar Tax Credits
- Solar Battery Systems
- Solar Panel Systems
- Buy Solar Panels
- Solar Engergy Panels
- Lower Your Electiic Bill
- Clean Energy System
- Powerpack Solar Panel Cost
- Home Kits, Off-grid Systems
- Kit Includes
- Utility Panel Rebates
- Best Monocrystalline Panel
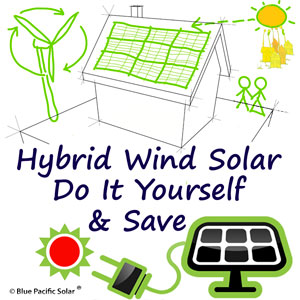


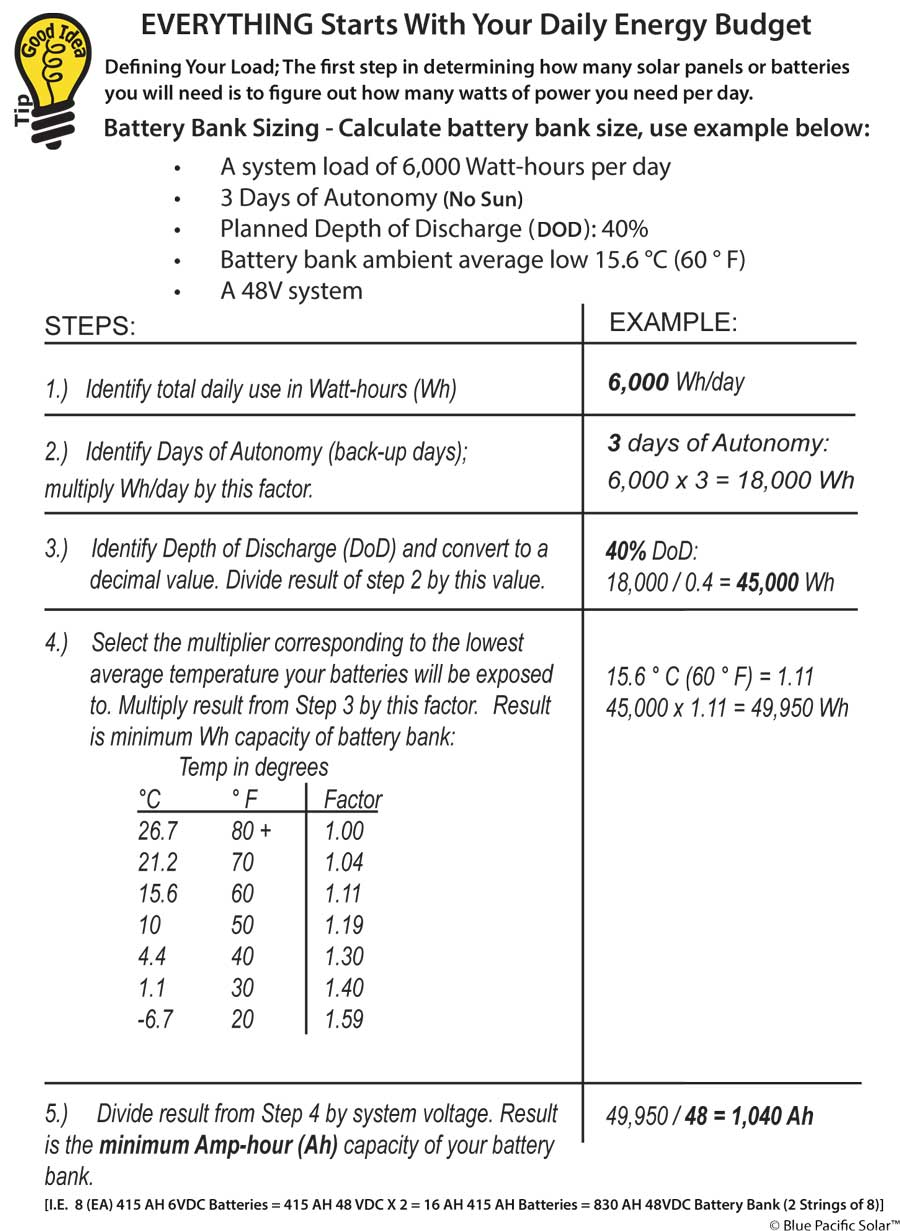
 Energy Load Worksheet (Excel)